2026-09-21
One curing cycle, step by step: the three pressures, the vacuum stage and two common faults
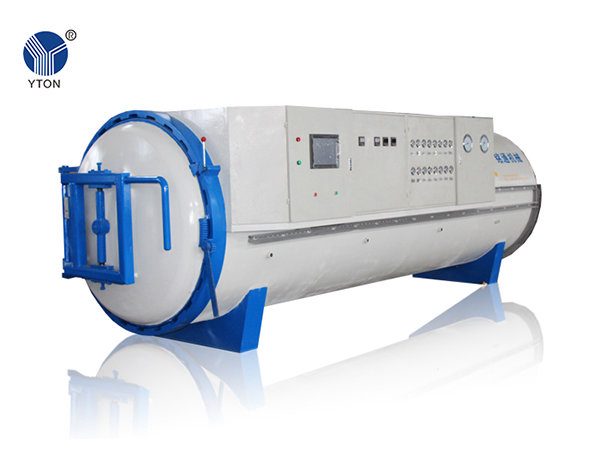
In a precure (cold) retreading line, the curing chamber is the most expensive machine, and the step where mistakes are hardest to undo. However well the casings are buffed and built, one badly controlled cycle can leave a whole load with poor bonding. Here is what actually happens inside a chamber during one cycle, and what each of the three pressures is for.
Step 1: test every envelope before the cure. Once the tyres are fitted with envelopes and curing rims and the hoses are connected, the fan stays off. Each tube is filled with low-pressure air at 0.2 MPa, then each envelope is evacuated to −0.1 MPa and its small valve closed. If the needle holds, the envelope is tight; if it creeps back, the envelope leaks and must be fixed before you start. During this test, tube pressure must never go above 0.3 MPa, or the tube can burst. When every position has passed, a steel blanking plate goes over the rim opening of the last tyre, so hot air goes around the tyres instead of straight through their centres.
Step 2: heat and pressure. Close the door, lock the safety interlock, and start the fan and heaters. Chamber, tube and envelope pressure each have their own automatic controller: tube 0.7 MPa, chamber 0.5 MPa. What actually presses the tread onto the casing is the difference between the two — the effective pressure: 0.7 − 0.5 = 0.2 MPa. Reading the tube gauge alone tells you nothing about whether the tread is being pressed hard enough.
Step 3: the vacuum stage. At about 90 °C (factory setting) the chamber vents for 8 seconds and the vacuum pump starts, drawing out the air trapped between envelope and tread. Every vacuum gauge must fall below −0.05 MPa. If one will not, feel the envelope hoses: the hot one belongs to the leaking envelope. Close its vacuum valve and open the vacuum exhaust valve beside it. When the vacuum time is up (40 minutes as set at the factory), the pump stops and the envelopes are filled to 0.3 MPa.
Step 4: the cure. When the chamber reaches the set temperature (115 °C from the factory), the curing timer starts. Close to the set point the heaters switch to short pulses, fewer as the temperature rises, which keeps the temperature steady. Throughout the cycle, a pressure that runs high opens its automatic relief valve; one that runs low lights its lamp and sounds the alarm. The curing time itself is set from your cushion gum supplier's cure data and the tread thickness.
Step 5: unloading. At the end, close the air inlet and stop the fan. Ideally let the chamber cool for about 40 minutes, then release chamber, tube and envelope pressure to zero before opening the interlock and the door. Never open the door while there is pressure inside.
The two faults we are asked about most:
1. Tube pressure dropping. Close the tube valves one position at a time and watch the small gauges; the one whose needle falls is the leaking tube. If less than 30 minutes of curing has passed, release the pressure, open the door and change the tube. After 30 minutes, close that position's tube and envelope valves and retread that casing again after the cycle. 2. Chamber pressure running high. Usually a leaking tube is feeding air into the chamber. Find that tyre and close its two valves.
There is no shortcut at this step: good bonding comes from watching the gauges every cycle — temperature, the three pressures and the vacuum readings. To size a chamber for your plant, send your tyre sizes and daily output to mingtong@yton.cc, or run the plant calculator first: new.yton.cc/en/calculator/.